
How to Set Up a Facebook Pixel: A Step-by-Step Guide
Ready to dive into the world of Facebook advertising? If you're looking to optimize your ads and retarget your visitors, setting up a Facebook Pixel is a must. Don't worry if you're not tech-savy; we've got you covered with this step-by-step guide. Let's get started!
What is a Facebook Pixel?
First things first, what exactly is a Facebook Pixel? In simple terms, it's a piece of code you place on your website. This code collects data that helps you track conversions from Facebook ads, optimize ads, build targeted audiences, and remarket to people who have already taken some kind of action on your website.
Why Do You Need a Facebook Pixel?
Imagine being able to see which of your Facebook ads are driving sales or sign-ups. Or knowing exactly what actions visitors take on your site after clicking on an ad. This insight is invaluable, and it's exactly what the Facebook Pixel provides. It helps you understand the effectiveness of your ads and fine-tune your marketing strategy.
Step-by-Step Guide to Setting Up a Facebook Pixel
Ready to set up your Facebook Pixel? Follow these simple steps.
Step 1: Create a Facebook Pixel
- Log into Your Facebook Business Manager
- You need to have a Facebook Page to access your business manager. If you don't, you need to create one.
- Head over to the Facebook Business Manager and log in to your account.
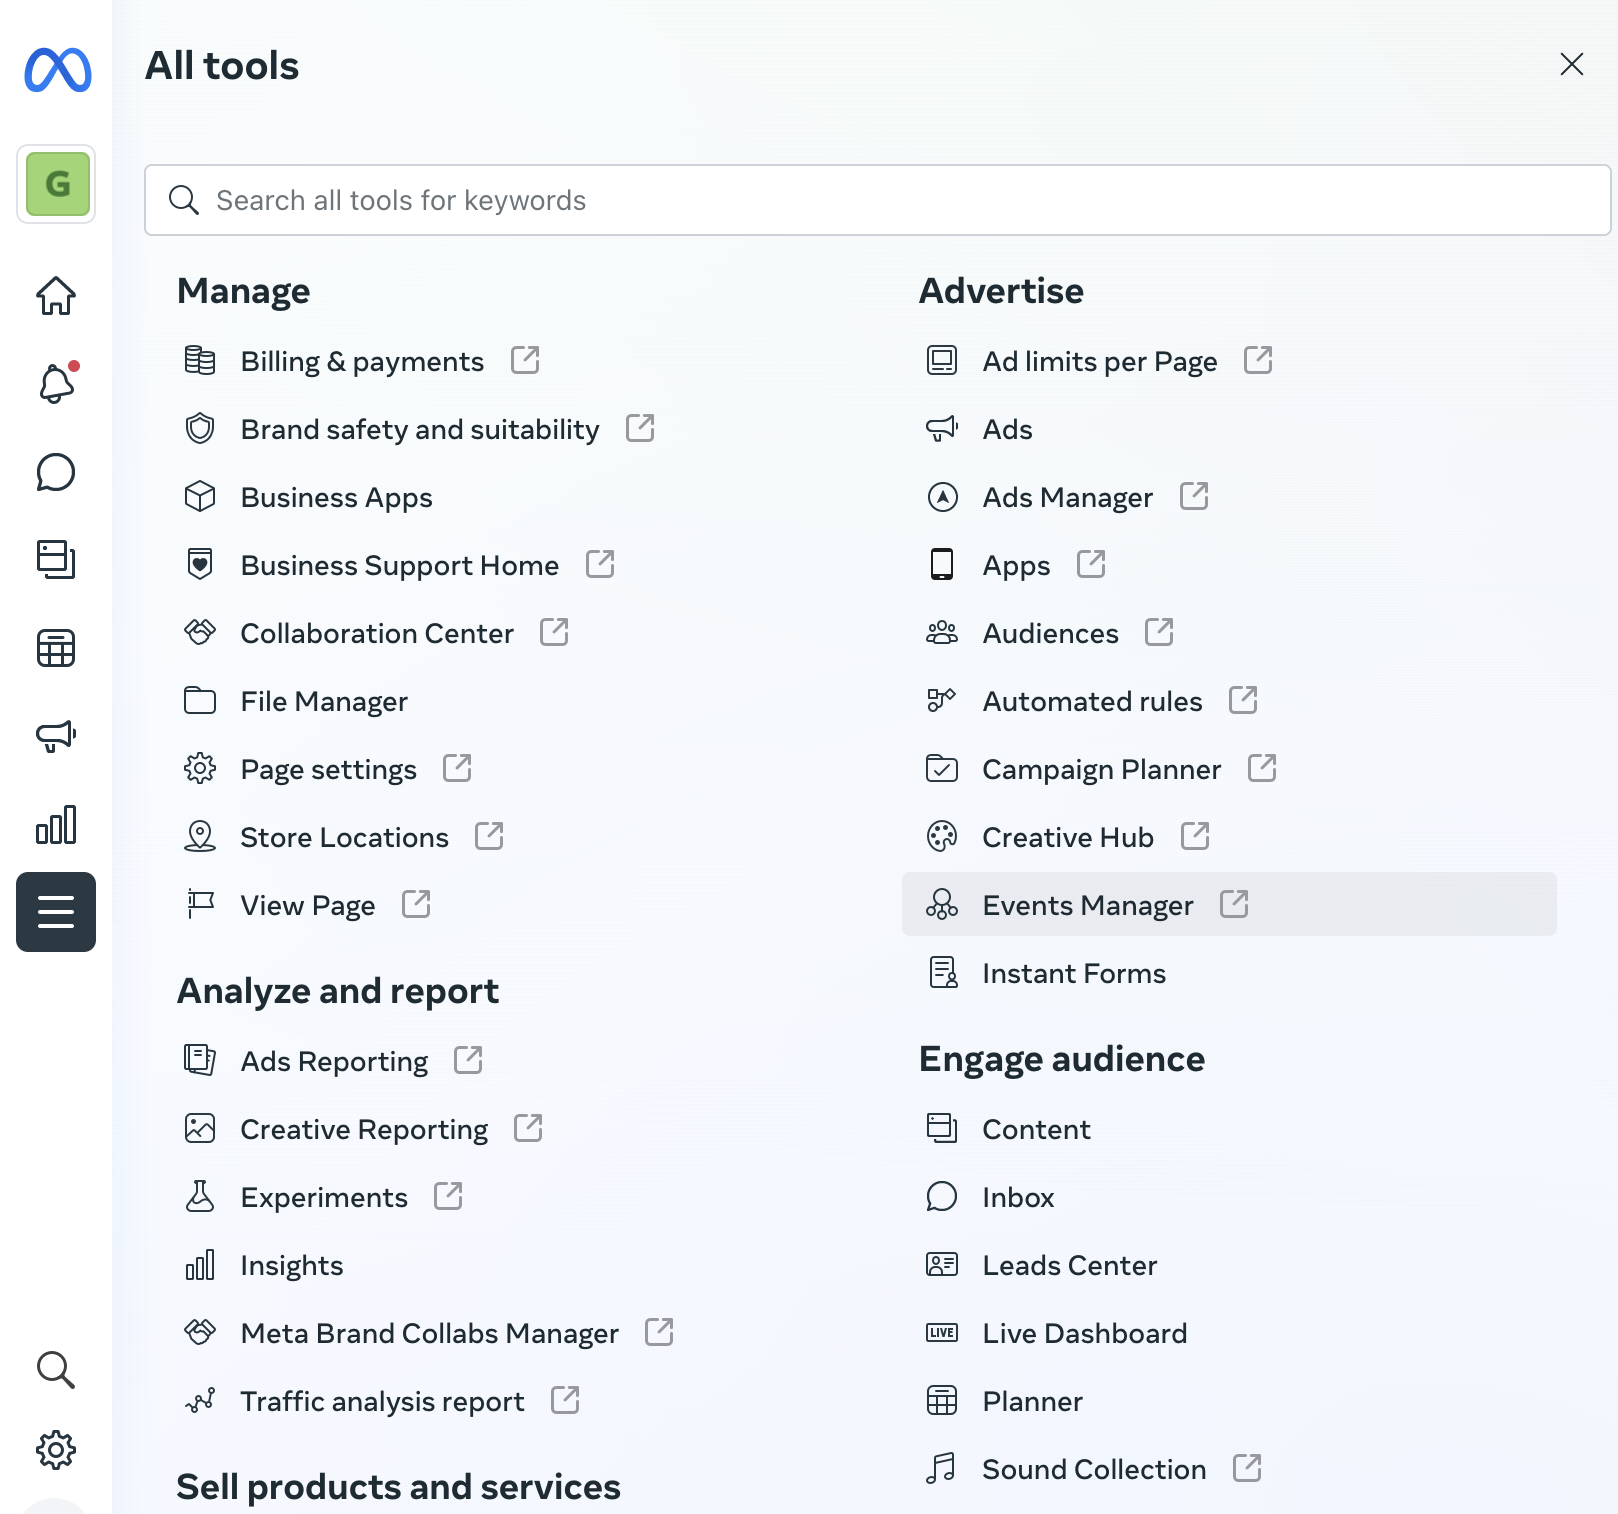
- Navigate to Events Manager
- Once you're logged in, find the menu on the left, click on "all tools" and select “Events Manager.”
- Create a New Pixel
- Click on the green “+” button to create a new data source, then select “Web”.
- Name your Pixel. Choose something that will help you easily recognize it, like “MyBusiness Pixel”.
- Enter your landing page URL when prompted (getallmylinks.com/yourpagename)
- Choose Meta Pixel Only
Step 2: Add the Pixel to Your GetAllMyLinks Dashboard
Now that you’ve created your Pixel, you need to add the code in your GetAllMyLinks dashboard.
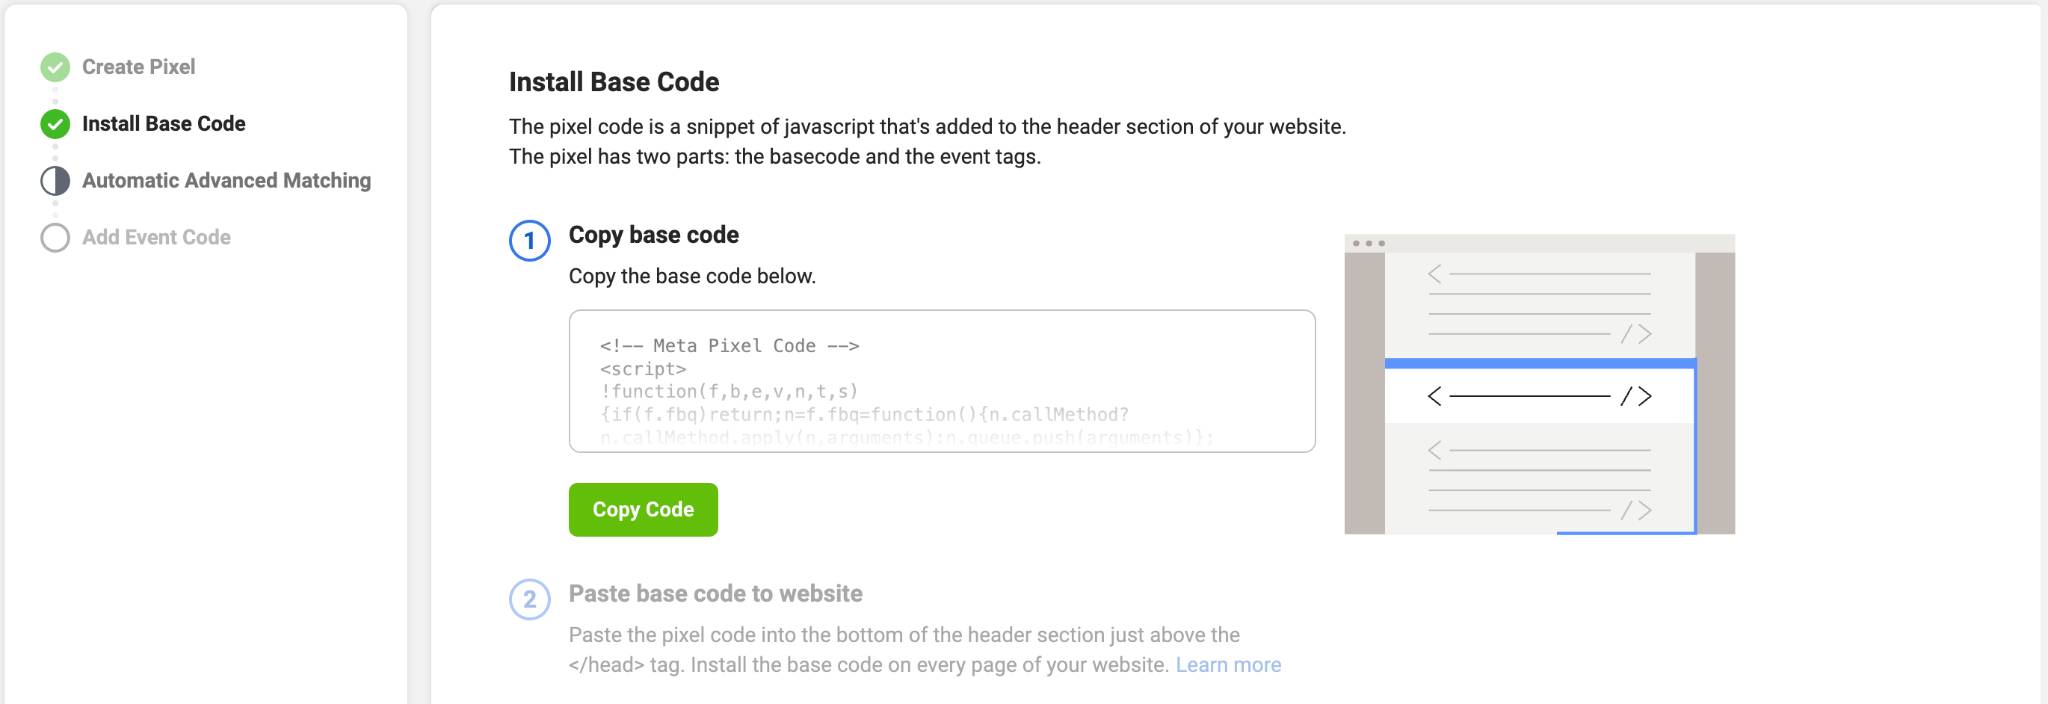
- Choose to Manually Install the Code
- Copy the Pixel base code provided by Facebook.
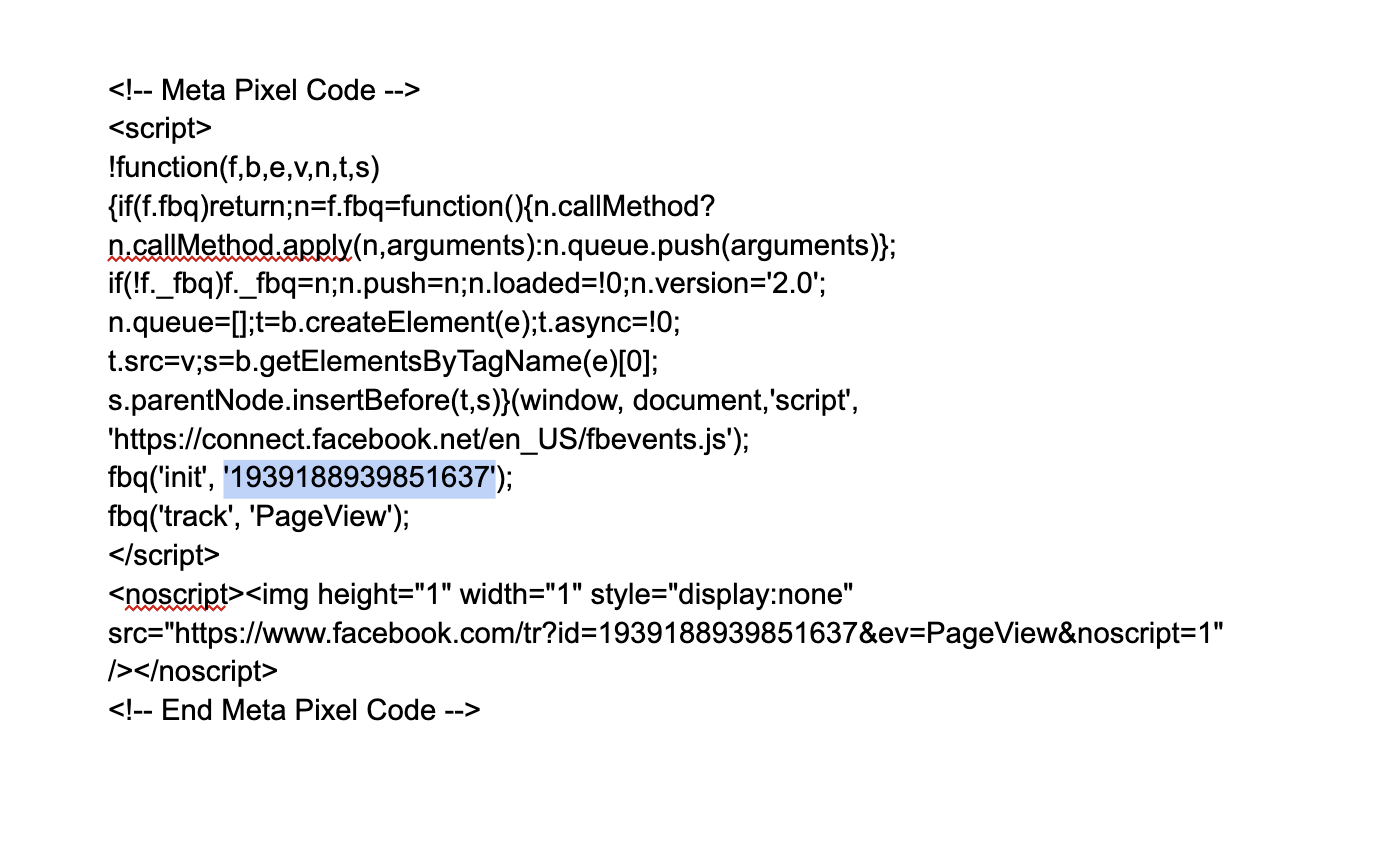
- You only need to retrieve the Pixel ID from this code. Paste it somewhere on a note or a google doc and find the line code
"fbq('init', '1234567891234567'); - Copy this number ID
Add the Tracking Code in Your Dashboard
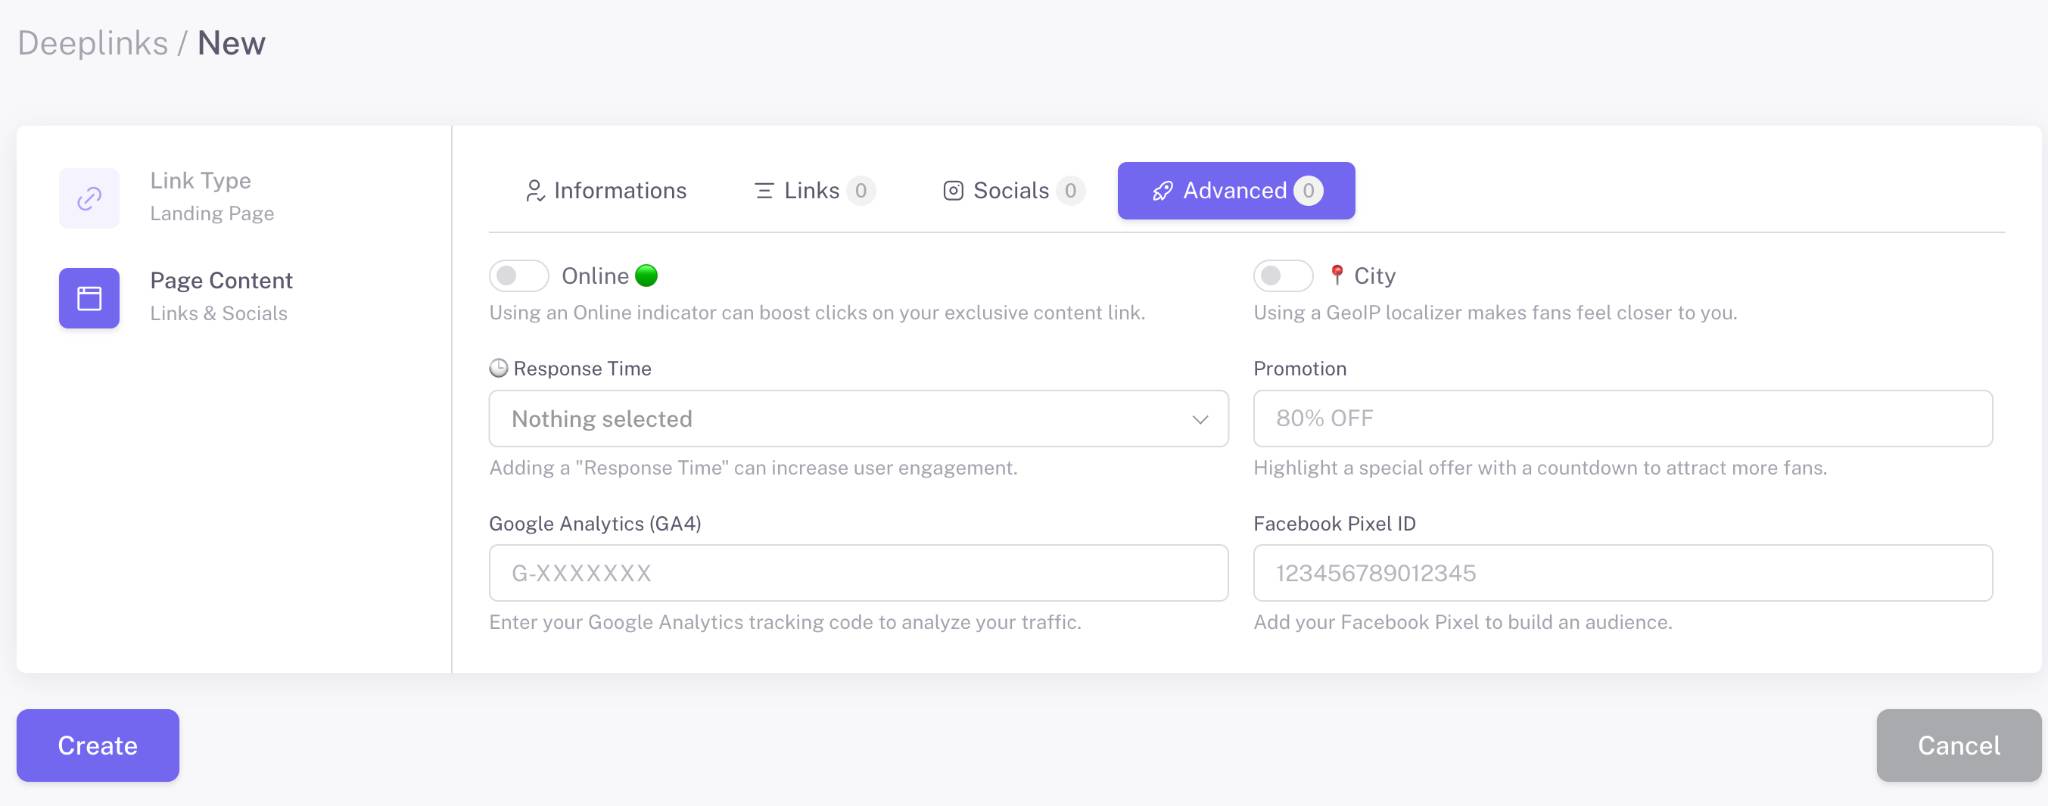
Create a new landing page (or edit the one you already created)
- Go to Page content
- Go to Advanced
- Insert your ID in the Facebook Pixel ID field.
Finish the setup
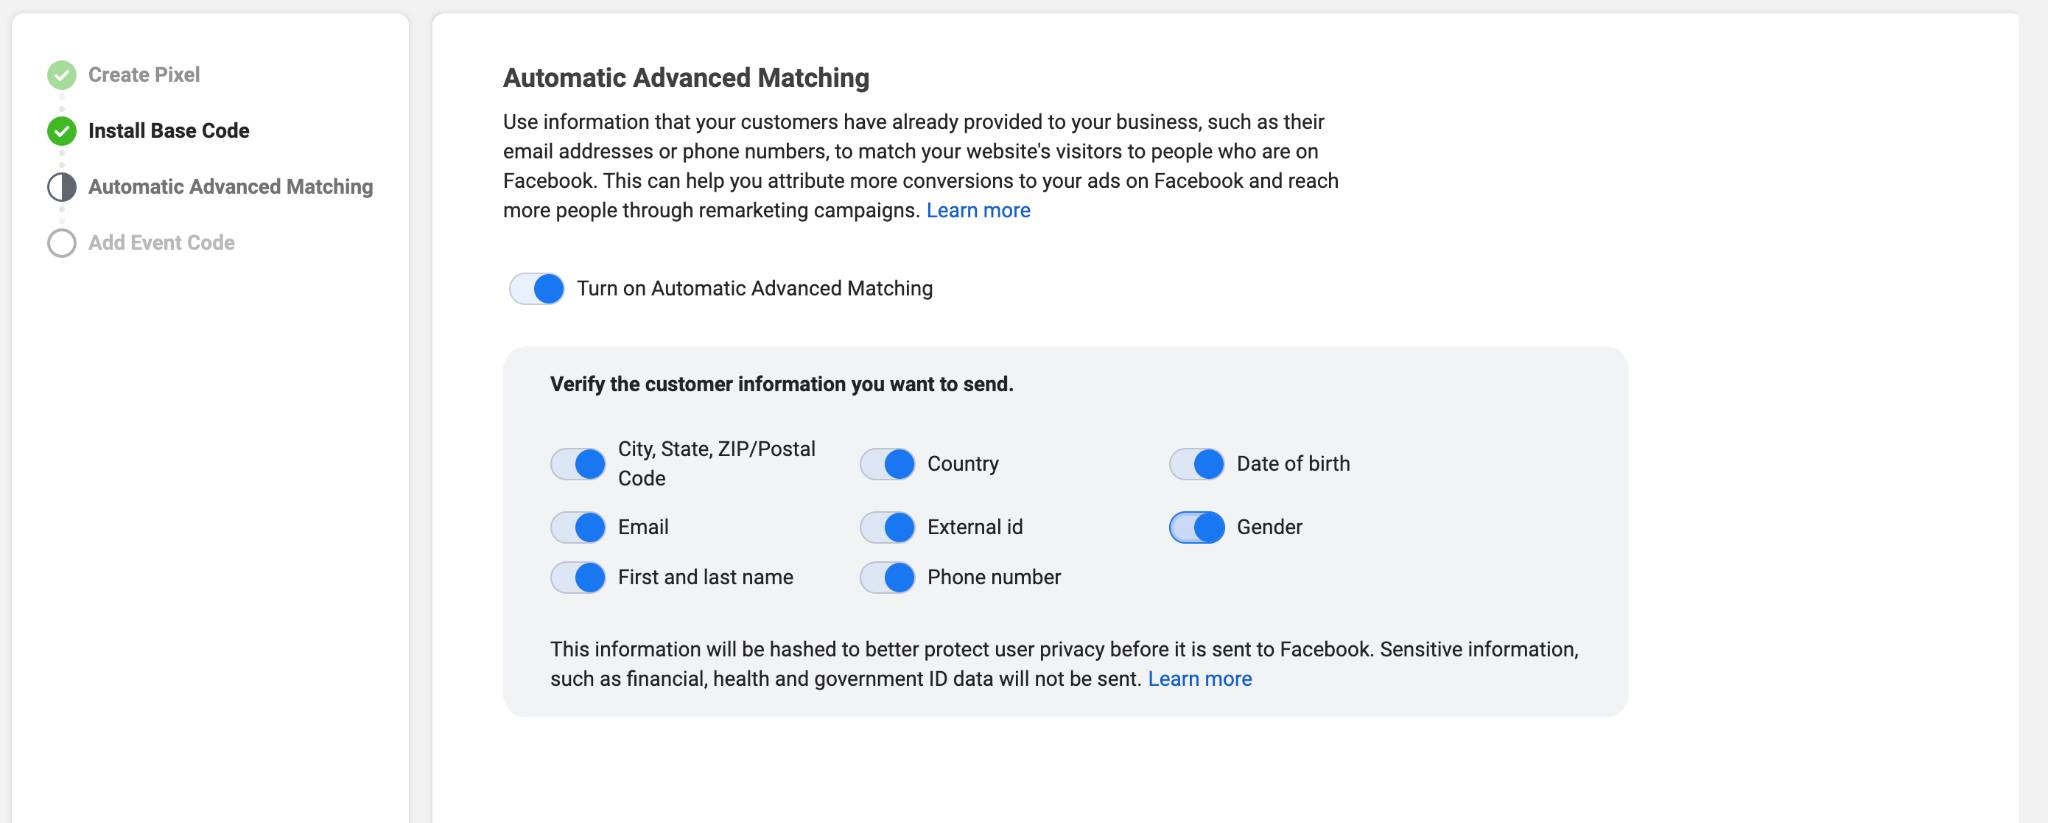
- Automatic Advanced Matching
- Turn on Automatic Advanced Matching
- Select all the customer information you want
- Click on continue
You can skip the event setup tool and click on "go to pixel overview"
Step 4: Test Your Pixel
Let's make sure your Pixel is correctly set up.
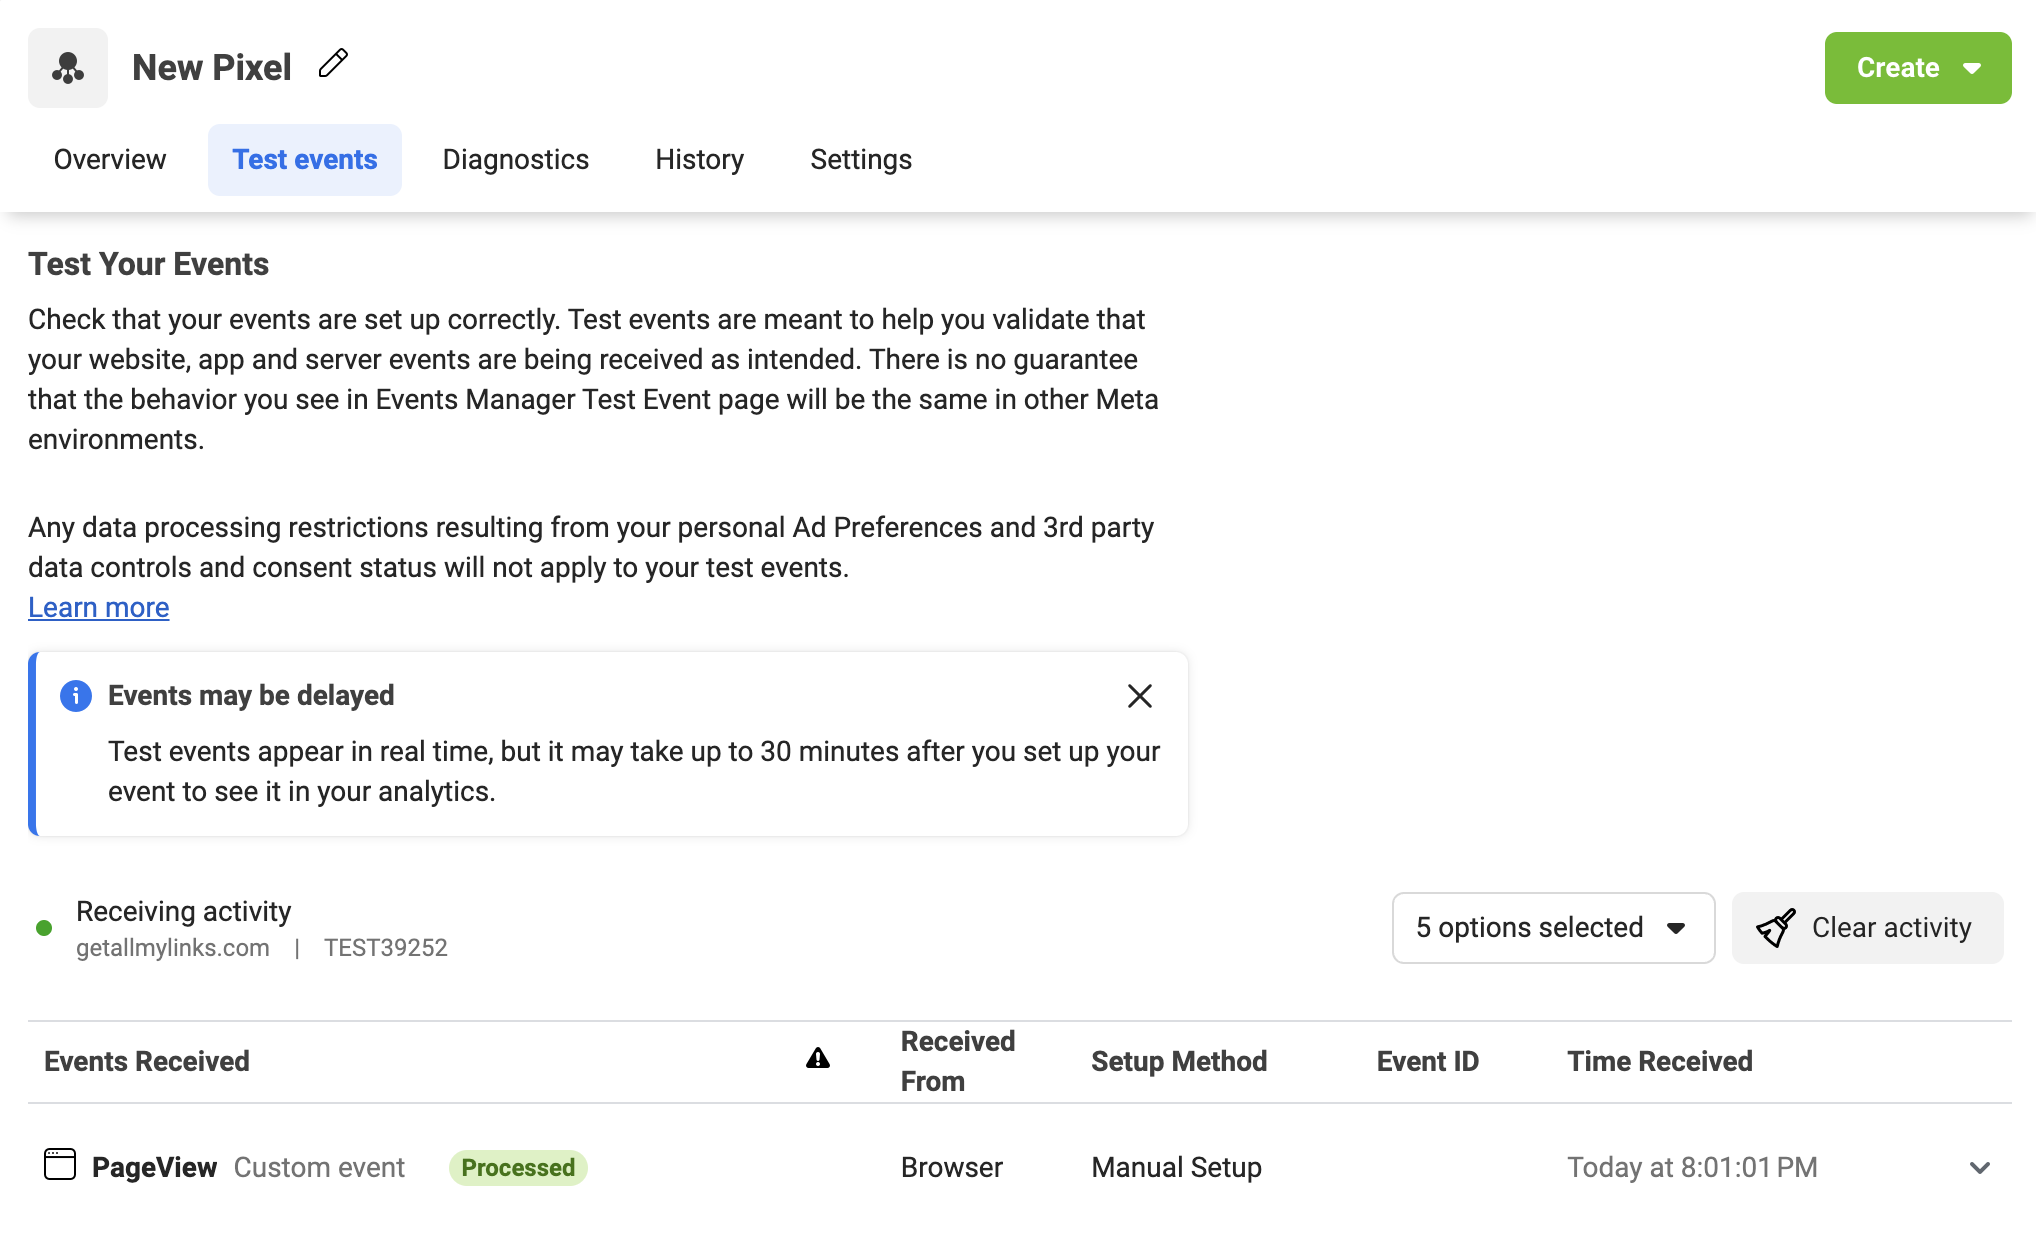
- Go to the Test Events tab
- Next to Overview, click on “Test Events.”
- Go to "Confirm your website’s events are set up correctly"
- Enter your landing page URL and open the website. You can close it and go back to Business Manager. If the Pixel ID is correctly setup, you should see "receiving activity"
Step 5: Start Collecting Data and Create an Audience
Now that your Pixel is set up and verified, you can start collecting data for your landing page.
Go back to "All Tools" and find "Audiences"
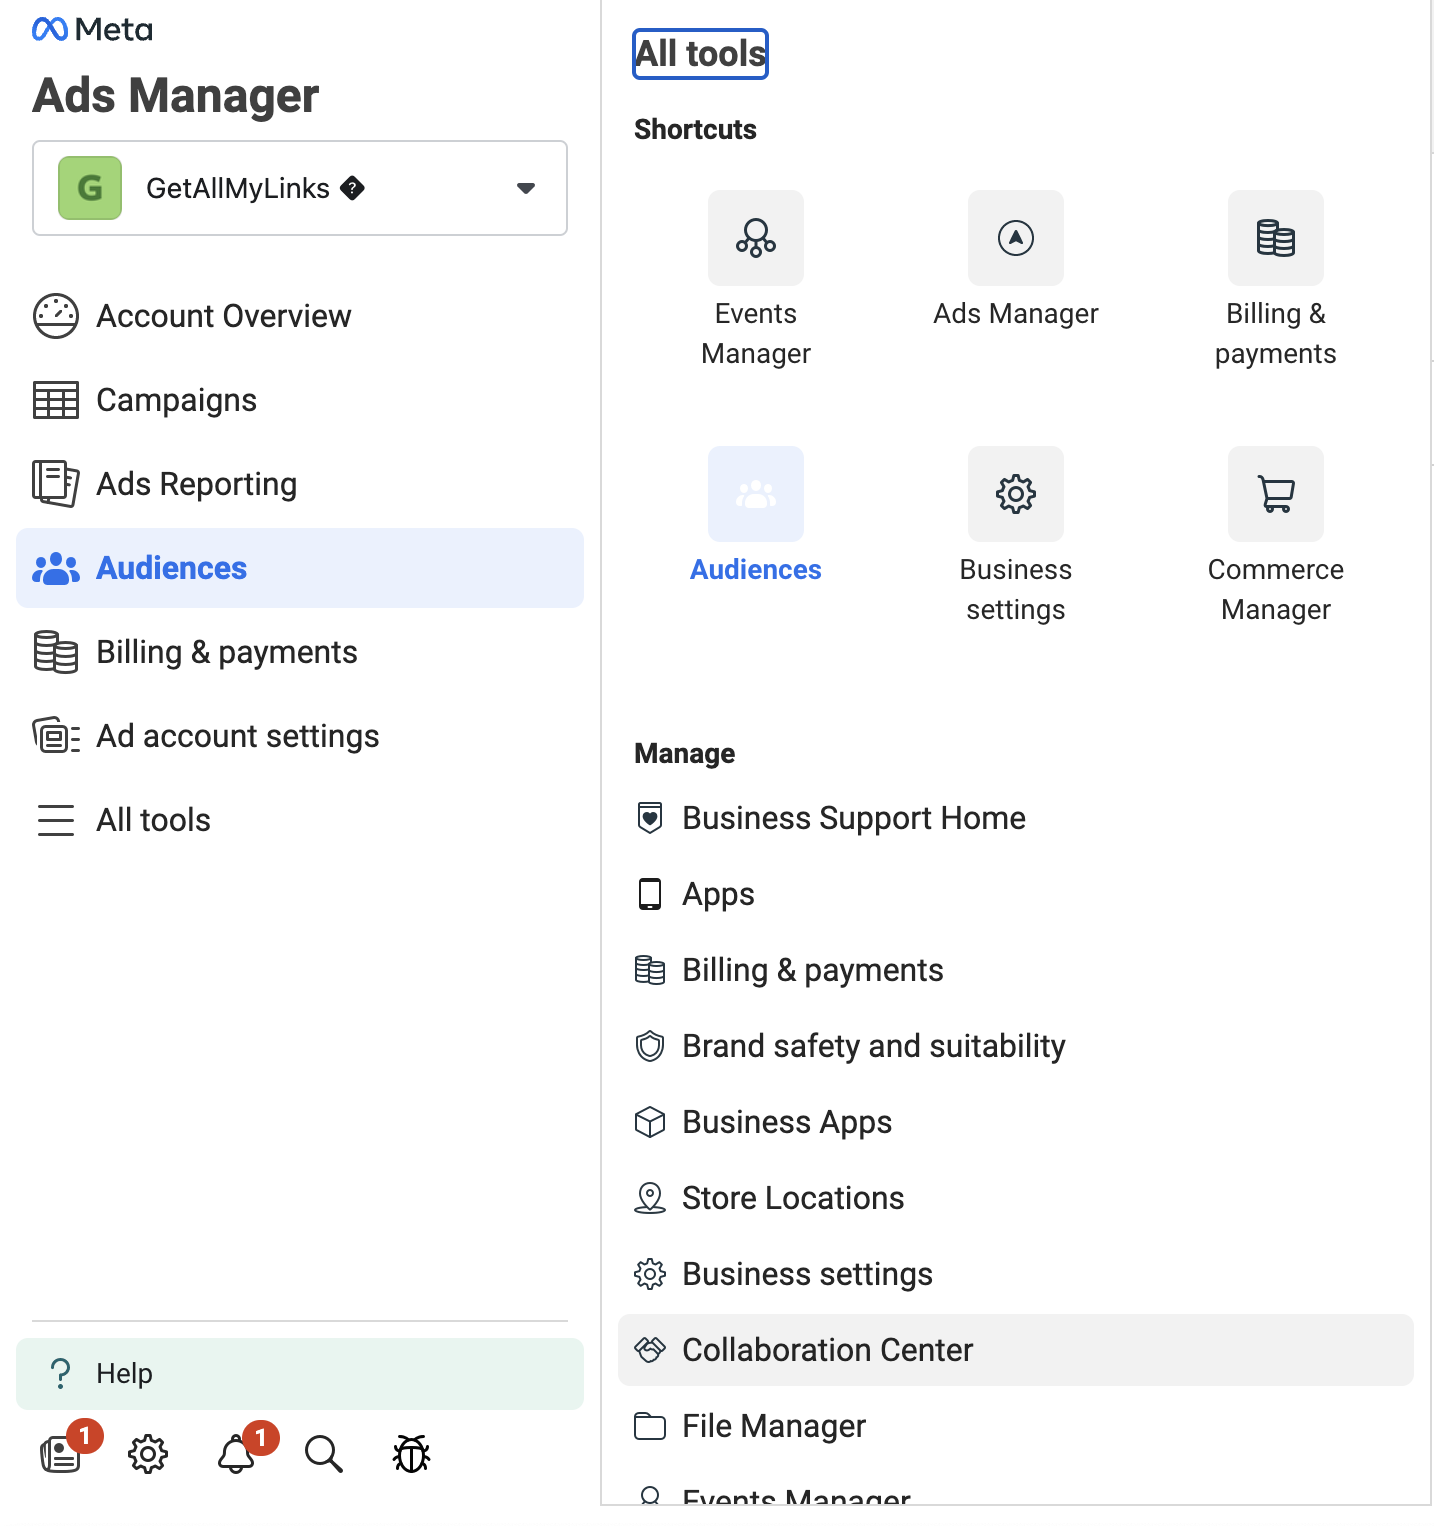
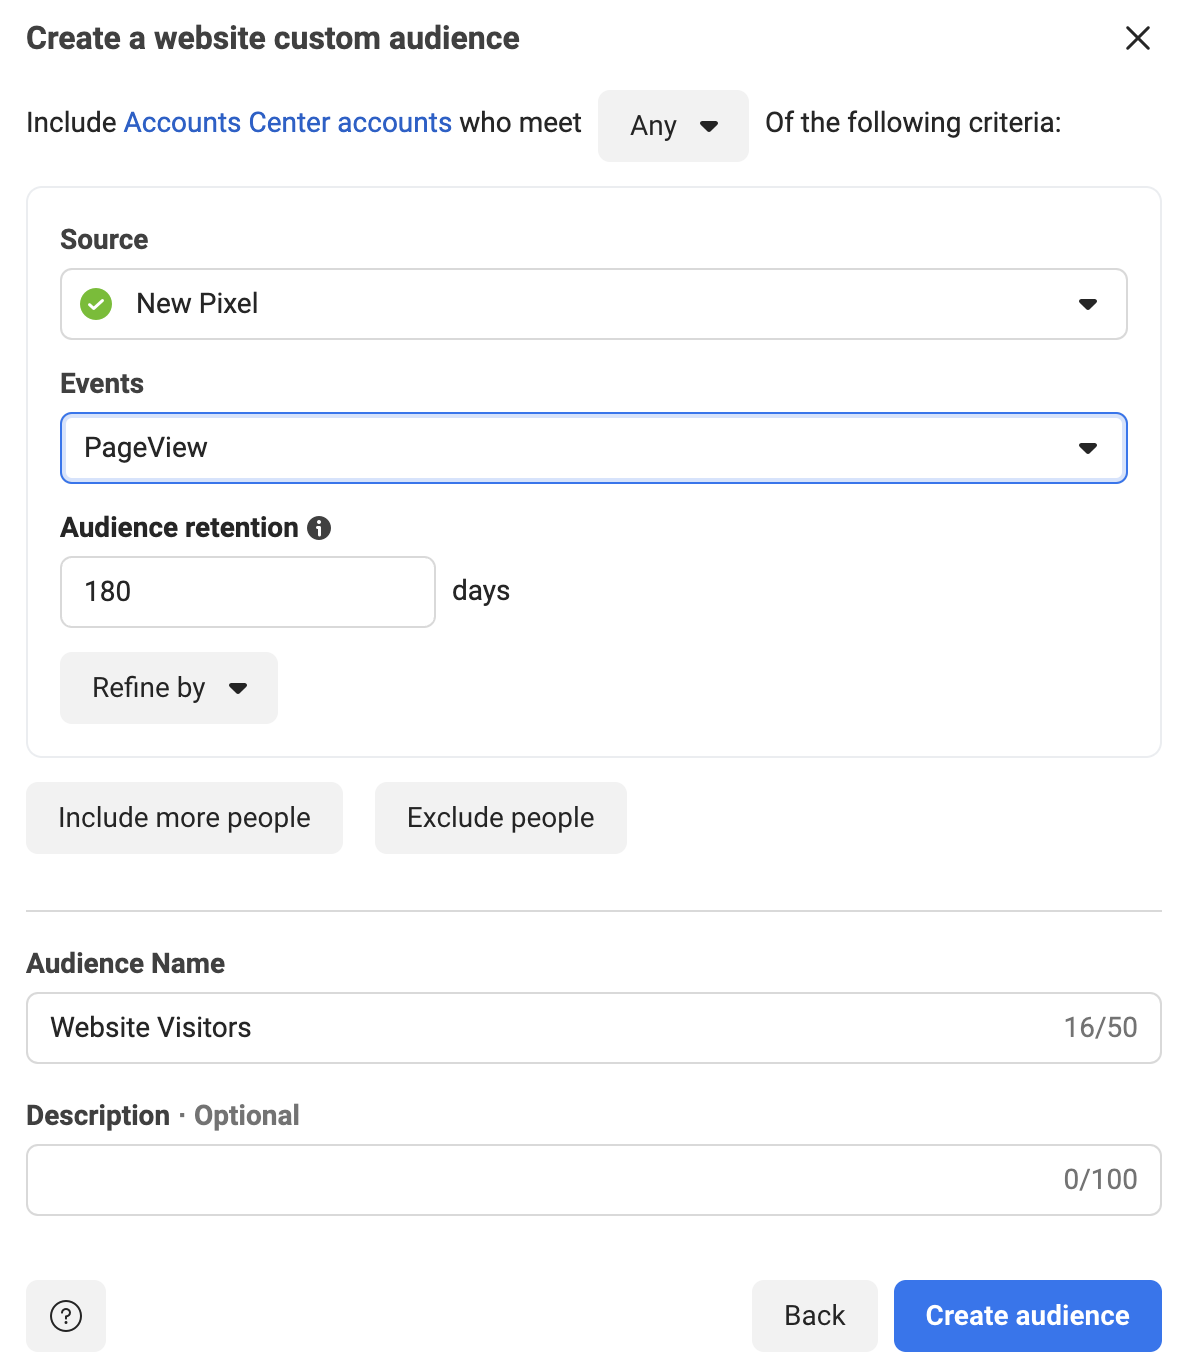
- Create a Custom Audience
- Choose "Website"
- Create your audience:
- Choose your pixel as your source
- Select the event "PageView". If you just created the pixel, it may need some time to appear.
- Change the days retention to the duration you'd like (180 days maximum)
- Setup a name
This newly created audience will take some time to collect data.
Conclusion
And there you have it! Setting up a Facebook Pixel might seem a bit daunting at first, but with this step-by-step guide, you’ll have it up and running in no time.
Once your Pixel is set, you’ll gain invaluable insights into your audience's behavior and the effectiveness of your ads.
Contact our support here if you need any assistance!